Hi Folks
Hope
you are all well on your way to having Christmas sorted. I know some
of you are so organised that you start your Christmas cards in January,
unlike myself who leaves everything to the last minute!
ONE OFF CLEARANCE DAY
I
wanted to let you know that we are having a one off clearance day on
Sunday 11th December in the Jennings Hall at the Lingfield Community
Centre, High Street, Lingfield, RH7 6AB, where we currently have our
classes.
As
always we are short on space and want to make room so we can get new
things in. You'll find lots of stamps, dies, papers and other bits and
pieces with great bargains to be had with either 25% or 50% off
everything. The event will run from 10:30 to 4pm.
We
would like to know if there is enough interest for us to also consider
running a pop up shop at regular intervals through the year, not
particularly for clearance but just as an opportunity for you to touch
and feel products. We'll be asking people for their opinion at the
clearance day.
ON LINE SALE AND GOODY BOXES
We don't want our on line customers to feel left out so we will have a limited release of Goody Boxes on Saturday 10th December
and will follow this up with the start of our on line sale the
following Saturday (17th December) for those of you who live too far
away to get to the clearance day.
From
past experience running the "shop" and on line sales simultaneously
creates problems with stock control as things are in shopping baskets
and don't come off the system until they have gone through check out,
which is why we are separate them. Over the last couple of years we've
done the online bit first so we thought we would switch this year.
Hope to see you soon
Sandy xx

Wednesday 30 November 2016
Red & Gold
Red & Gold


Hi there!
It's the last day of November
Such a quick month
Our theme this week is Red and Gold
and Jane Castle is here today
with a beautiful card:

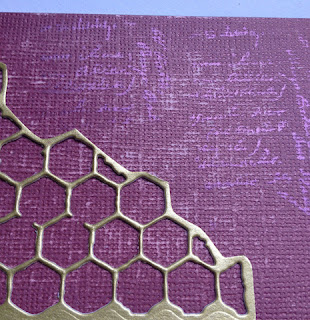
I started this card with a piece of 300gsm white card which was coloured with Fresco Chalk paints in Plum, Very Berry and Claret. Once these were completely dry I added some Distress Inks in Aged Mahogany and Fired Brick with a blending tool.

Next I stamped the leaves from PaperArtsy EDY12
and the trellis from Jofy 12 in Fired Brick and whilst wet
lightly brushed over some Cosmic Shimmer Mica Powder in Antique Red.
Once trimmed to size the centre was then die cut
with a Spellbinders die and embossed.
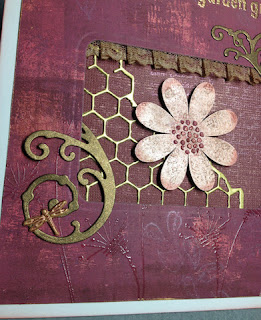
The top was stamped with ‘How Does Your Garden Grow’
from ELB03 and heat embossed using gold embossing powder.
The bottom section was then stamped with the flowers from Jofy 12
in versaMark ink and heat embossed using clear embossing powder.
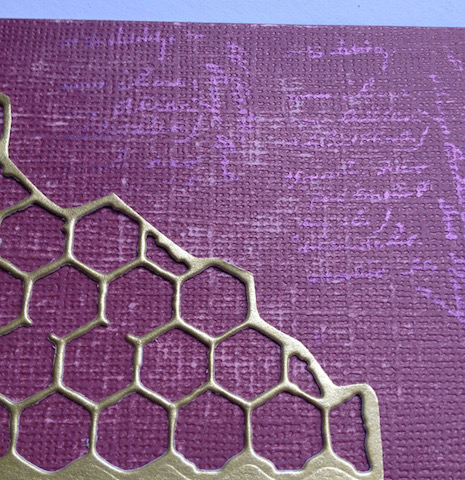
Next I made the centre piece for the aperture,
for this I used some Core’dinations sand it, tear it in dark burgundy
and lightly sanded before stamping with a text stamp
in Brilliance Crimson Copper ink and also
brushing with the mica powder.
The honeycomb was cut from gold card
using a Tim Holtz Thinlits die.
The lace was coloured with Distress Stain in Antique Bronze
and attached to the back of the aperture with double sided tape,
adding the pleats in as it was secured.

The flower came from a Tando Grab Bag

This was coloured with the Antique Bronze Distress Stain
and the texture on the petals came from liberally applying
Distress Stain through the sponge top.
The centre was decorated by applying Grunge Paste
through the stencil, then when dry
adding some Treasure Gold in Ruby.
The edges of the petals were hi-lighted with Aged Mahogany ink
The swirl was cut from some darker gold card
using a Crafty Individuals die.
This was then cut into 2 and stuck behind
the aperture to secure

The dragonfly brad was coloured with Renaissance Treasure Gold.
Materials Used
A lovely card with lots of texture
and techniques
Thank you Jane
Well I'm off to make some cards
see you all again tomorrow
Mickie xx
Tuesday 29 November 2016
Alpha/Dictionary Challenge 2016 Winner
Alpha/Dictionary Challenge 2016 Winner

Hallo!
Cheery greetings from the Sunshine Coast
The sun is really bright this morning and
just makes you want to smile and smile
Where has she got to? You may well ask!
Anyway, I'm here now to announce our
latest lucky Challenge winner
Let's go and see who Mr R G has picked
this week.....................
20 of you took on the I challenge....
and the winner is.............
No 11...........
Krazy Jane

Congratulations and please email me at
mickiecraftbarn@gmail.com
so I can send you your prize
There were some ingenious entries and
I really enjoyed visiting your blogs.
Commiserations but well done to you all
Mickie xx
Sunday 27 November 2016
Alpha/Dictionary Challenge 2016
Alpha/Dictionary Challenge 2016
Hi There!
Hope you have all had a good week
it has been a good one here and we've
been catching our breath. Welcome to
the little oasis of calm that is the
Craft Barn Blog.
Of course it is Sunday, which is
Challenge Day! Yayyy!
This time the letter is
Y
and here is another picture from
Karen Gist's printer's tray to set
the creative juices off:

As always, you have two weeks to
enter as many times as you like via
the link. If you can't use the link
then send your entry to me at
mickiecraftbarn@gmail.com
and I will add it/them for you
The link will close at midnight on
11 December and the winner will
be picked by The Random Generator
the following Tuesday
Good Luck everyone!
Looking forward to seeing all
your entries
Mickie xx
Saturday 26 November 2016
Wax Paper & Acetate
Wax Paper & Acetate


Hello
Today we have gorgeous project to inspire us
for those Cards we still have to make....
Here is Hazel Harler who is Caught in Crystal:
I haven't done this technique for a few years so
I thought it was time to have another go.

You will need a sheet of acetate, alcohol inks, glossy accents
and crumpled tissue paper.
Other items that can be added are glitter, micro beads,
mica powder, gilding flakes etc
I squeezed stickles and glossy accents over the acetate

Then I dripped in some alcohol ink

I covered the inked acetate with the tissue paper and pressed it down,
if you are wearing rubber gloves you can do this with your fingers,
I would suggest you use a ball of kitchen towel
if you're not wearing gloves.

Leave to dry preferably overnight.
This is a close up after it had dried

A few sheets of different colours.

I've made a few cards with some of my acetate.
For this card I stamped the card blank with snowflakes using Fresco metalic glaze, the wooden snowmen were covered with Treasure Pewter wax

For this card I covered some black card with inca gold Alchemy wax and used a Stampendous stamp and die for the poinsettia. The acetate had some glitter added to it.

The acetate can also be die cut, I used a Sizzix die. The card was coloured with distress ink and I layered different handmade papers at the bottom. I added gilding flakes to the acetate

I covered the Tando snowmen with Frantage embossing enamel, I added mica powder to the acetate and the snowy mesh is from my stash.
For the next two cards I stencilled Imagination Crafts sparkle medium using Dreamweaver stencills. The sentiments on most of the cards are remnent rubs


I hope you can give this technique a try as you can get some beautiful results.
Items used:
Hazel this technique is awesome and the cards are beautiful.
Thank you for sharing this with us
Mickie xx
Friday 25 November 2016
Snowflakes
Snowflakes
Hello everyone,
Are your festive preparations well underway?
Parcels sent, presents wrapped?
Parcels sent, presents wrapped?
Can't say mine are.........yet!
Here is a project from
Louise Thomson
to keep you wrapped up!
I love making home-made gifts to give at Christmas,
but why stop there?
Here is a simple project to make your own
wrapping paper and matching gift tag.

For the tag;
Die cut two tag shapes, one in white card, the other in acetate.
On the acetate, stamp the snowflakes twice in silver versa colour ink.
Sprinkle with embossing powder and heat emboss. Set aside.
Smear distress ink across your non-stick craft mat,
starting with the lightest colour

Spritz with water and then press your white card tag in to the ink.

Dry with a heat gun.

Stamp the snowflakes all over the tag using Versacolour Neptune ink,
then add highlights to the snowflakes using the gel pen.

Stamp the greeting on a rectangle of white card,
doodle a border with a fine liner and
secure to the base of the tag.
Thread the two tags together with the acetate on top
using a selection of coordinating ribbons

Paint a Tando star using fresco finish Antarctic paint,
then smoosh in distress ink as with the base of the tag.
Doodle on to the star using the white Gelly Roll pen
and cover in a coating of Wink of Stella.
Cut out a snowflake from the scrap of acetate
and secure on the centre of the star.
Add silver pearl liquid pearls to it

Secure the star to the top to the tag to complete it.

For the wrapping paper;
Smoosh distress inks all over your non- stick craft mat
as before and starting with the lightest colour.
Spritz with water and move your mat around
to encourage the colours to mix together.
Lay your tissue paper over the top of the mat and press down.
Don’t be tempted to try and lift it back up at this stage as it will tear!
Don’t be tempted to try and lift it back up at this stage as it will tear!

Use your heat gun to dry the whole sheet out -
you will see the colour transfer as it dries.
When fully dry, remove from the mat.

Stamp all over with JOFY mini snowflakes
using Neptune versa colour ink,
then add highlights with a white gel pen
and dot icicle stickles across the sheet.

When the paper is dry, wrap your gift,
tie with some pretty ribbon and add the tag
(NB: picture shows alternative version of tag)
Supplies needed;
Distress inks– tumbled glass, sketched blueprint, wilted violet, shaded lilac
Versa colour ink pad – silver, neptune
Cosmic shimmer embossing powder– silver fish
Tando creative stars grab pack
Fresco paints in Antarctic
Heartfelt creations – celebrate the season stamps
Acrylic block
Tando creative stars grab pack
Fresco paints in Antarctic
Heartfelt creations – celebrate the season stamps
Acrylic block
A lovely project to keep Santa's Little Helper
happy in the run up to the Festivities
Wonder what we have in store for you tomorrow? See you then!
Mickie xx
Subscribe to:
Posts (Atom)